
Page updated: 1 October 2010
 Introduction
If your cruising ground is likely to include many bridges then a tabernacle is, effectively, essential for lowering the mast - especially if the bridges to be cleared are particularly low.
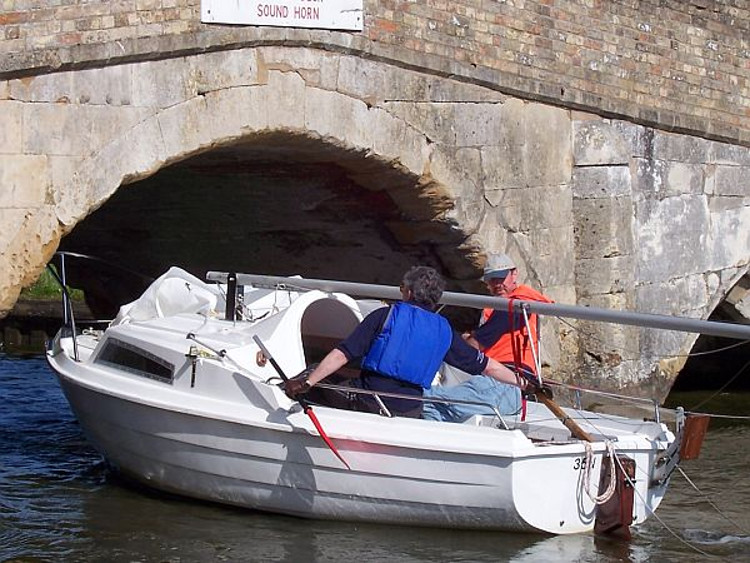
With a tabernacle the mast no longer pivots on the cabin roof but about a foot above. This allows the mast to drop to the horizontal when lowered, something which is otherwise impossible because of the raised roof line over the cabin doorway.
Dimensions
Below is a recent example supplied by Marine Weld, of North Walsham:


The measurements for this example follow:
| Steel Thickness: | 5mm |
Baseplate: |
|
| Length: | 150mm |
| Width: | 120mm |
Uprights: |
|
| Height: | 298mm |
| Spindle Centre: | 254mm |
| Width: | 88mm |
| Space Between: (Note #1) | 57mm |
Backplate: |
|
| Height: | 117mm |
| From Base: (Note #2) | 85mm |
NOTES:
1. The width between the two vertical plates of the tabernacle is
just sufficient to take the mast, which has a tube welded into it to
take the pivot bolt. Adjust this measurement to suit your mast!
2. The distance from the base to the bottom of the back plate must
be determined by the halyard pulleys. On this example the pulleys
for side by side, not one above the other.
3. The back plate not only provides stiffness to the structure, but
also a loop for securing the kicking strap.
4. The hinge bolt has no thread between the plates and a domed nut
is used so that it self-tightens, rather than depend on squeezing
the tabernacle uprights.
Installation
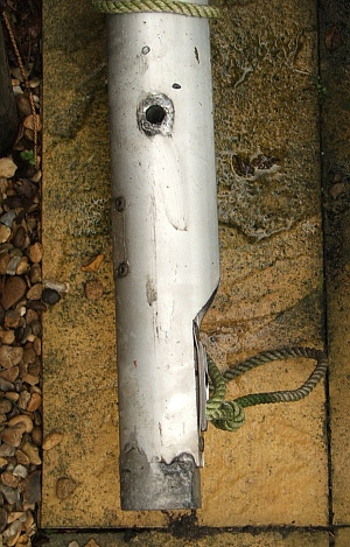
The base plate of the tabernacle is secured to the cabin top by four bolts. These pass all the way through the cabin roof and, on this two-berth example, the reinforcing plate on the ceiling of the cabin.

When upright the base of the mast sits snugly on the tabernacle base plate. In this way the weight of the mast is taken on the base not the pivot part way up the mast. If the base of the mast to be able to swing upward in an arc, there can be no extension to the rear of the mast base. The base of the original SSS mast did protrude and this formed part of the original low level pivot. The one on the mast shown below needed it to be cut away. (The work on the mast below looks a little untidy. This is because there was wear where the original Pop Rivets secured the casting to the mast. The rivets have been been replaced with somewhat crude, but secure, welding.)
The final part of the installation of the tabernacle is to remove any bottle screw or other "permanent" fixing for the forestay and add a line to the lower end instead.

The Tabernacle in Use
With the tabernacle installed and the mast upright, lowering it is simply a matter of releasing the forestay and paying out the line attached to the forestay. The ideal length of the line is around seven metres. This enables the task of lowering the mast to be done single handed, as described below.
Before starting to lower the mast lower the main sail and stow it and the boom in the cabin. There is no need to drop the jib completely, but the halyard must be released and sufficient line paid out to allow the bottom of the mast to swing forward as the mast drops. Once these tasks are done, leave the cockpit and go forward. Release the lowest of the clips on the jib from the forestay. (As the mast falls backwards the junction of forestay and line will move sufficiently to snag on the lowest of the clips.) Then, release the forestay and keeping tension on the line return to the cockpit.
Stand on the cabin threshold, reach forward and give a pull on the mast to start it moving. Meanwhile gently pay out the line on the forestay, keeping sufficient control that the mast lowers gently. As the mast nears the horizontal the line on the forestay becomes less effective at controling the mast, so you need to reach up and take hold of the mast to control the final part of its descent. As the mast reaches the horizontal, push the forestay well to one side of the tabernacle to ensure it does not get kinked. This will happen if the mast has been lowered straight, as it should be, as it's natural tendency is to get caught between the mast and either of the side plates of the tabernacle. It needs to be pushed well to the side as it can also get caught on the bolt that acts as the mast's pivot.
Once lowered the topping lift and main halyard will be very slack and hanging over the stern. To avoid the risk of them becoming tangled round an outboard prop when motoring under the bridge, take up the slack and give them a turn round one of the mooring cleats in the cockpit.
Raising the mast after passage of the bridge is the reverse of this procedure. With one additional note. You need to ensure that the halyards and jib sheets do not get trapped between the mast and the cabin top or sides of the tabernacle. Before beginning to raise the mast, push the jib sheets well clear and do what you can to ensure there halyards will not get caught as the mast approaches the vertical.
These notes obviously only refer to a hanked on jib and further tips on how to handle a furling genoa when lowering would be welcome. (Use the Forum.)
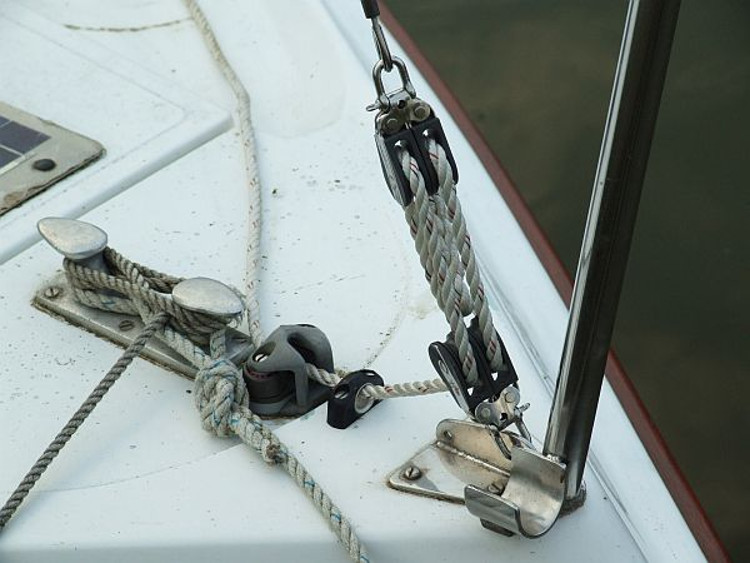
Getting reasonable tension in the forestay once the mast is upright can be a problem. The owner of the boat in the photograph above reports that his method is to wrap the forestay line around the top of the pulpit as far back as possible and then to tread on the line to add the final bit of tension needed. He also reports that the fairlead ahead of the jam cleat needs to be moved slightly further forward to ensure that the line can pass through the long shackle that holds the strop attached to the tack of the jib.