
Page updated: 20 February 2016
Making a hole in any part of a boat makes that point prone to leaks. Here we consider two fittings below the waterline. Other pages considers Deck and Cabin Fittings and the most common source of leaks.
 Depth Sounder
Someone on the old mail list (replaced by The Forum) asked:
"Has anyone ideas on the best place to fit a depth sounder to a SeaHawk? I don't really want to drill the hull unless its necessary and am thinking of siting the transponder just forward of the stub keel and using an epoxy paste to glue it to the inside of the hull. The manufacturers recommend using one of their special kits but I assume that ordinary glass fibre paste should do the job or will it?"
A member responded:
"I fitted my depth sounder port side under the cockpit sole, log is starboard side. I found it did not work very well in front of the stub bilge, when heeled it was not looking through solid water but water with air bubbles in it. Try it with chewing gum or a bag full of water. If you epoxy the sender there must be no air bubbles in the epoxy. I used a kit, tube full of oil glass fibred to hull!"
The image below would seem to suggest that there is no place under the hull that is guaranteed to get good results.

This boat is seen on a virtually flat lake in breeze of about force five. The wave effect seen is created entirely by the motion of the boat through the water, not by the wind on the water surface. It is clear that the water at the leading edge of the keel is likely to be suffering noticeable cavitation while even the centre line of the hull appears to be clear of the water under the cockpit.
If you can offer further advice or photographs of a depth sounder or other fittings that work satisfactorily, then please report using the Forum.
Sink Outlet
This boat was having an equivalent of the Reedcraft galley moulding fitted as part of a cabin customisation. In the first photograph, we see the basic framing in place that acted as a guide for the location of the drain.
At this point a used stainless steel sink had already been acquired. This had determined the gauge of polythene tubing that was needed to run between the sink and skin fitting which, in turn, set the size of jubilee clips and fitting that had to be purchased.

The first step was to drill a guide hole through the hull. This was done from the inside of the cabin. Then the circular saw fitting was attached and the appropriate hole to take the skin fitting was then drilled from the outside. When the GRP core was prized out of the saw, the hull was found to be only around 5-6mm thick at this point.

On the outside of the hull, the area around the new hole was cleared of all old anti-fouling. Evo-Stik Plumbers Mate was then applied to the flange on the skin fitting and round the inside of the hole before it was pushed into place. Once back inside the cabin, plenty more Plumbers Mate was applied to the flange of the nut, to ensure that all the undulations on the raw side of the hull were well filled, before it was screwed tight. The skin fitting was right-angled, rather than straight, so that the end of the fitting could be turned to point roughly towards the drain of the sink.
The next stage was to fit the sink. When obtained this had a considerable rectangular flange on it. Two of the corners had needed to be sawn off to get it to fit in the plywood top of the galley. (A third corner was also removed. This was to allow for the possibility of later fitting a hand pump which could be used to fill the sink.) The top veneer was also removed from the plywood so that the sink could be inset and allow the Formica that was to form the surface to be applied.
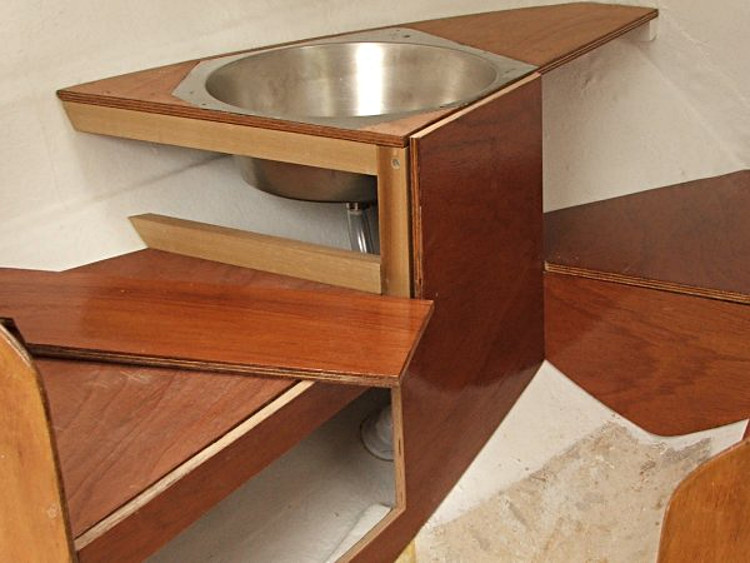
With the sink in place, the tubing was cut to length and jubilee clips fitted, after which the rest of the galley unit could be finished. In spite of the inevitable worry about cutting a hole in the hull beneath the water line, this proved to be straight forward project.
Ten years later it is reported still not to be letting in a drop of water.